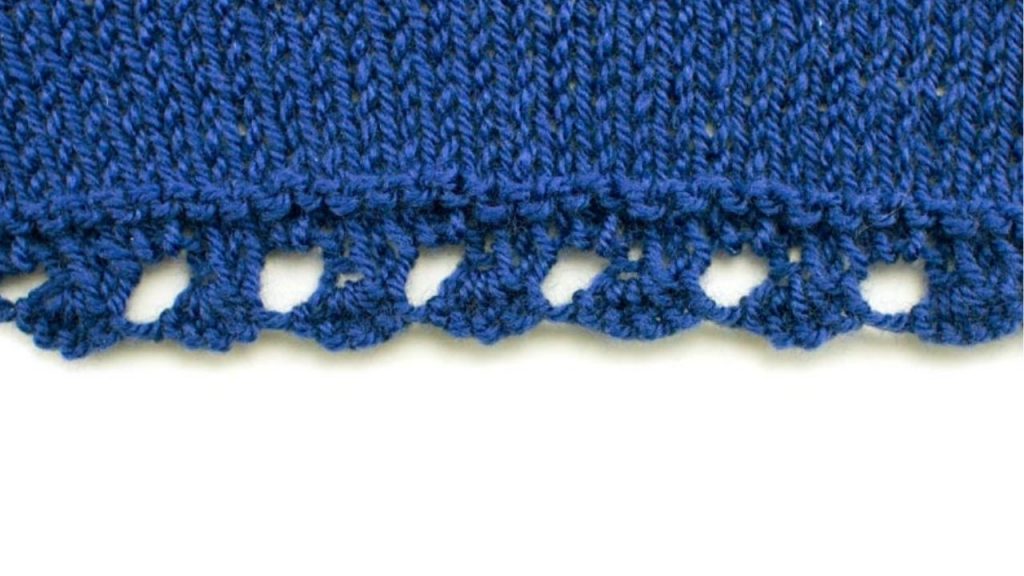
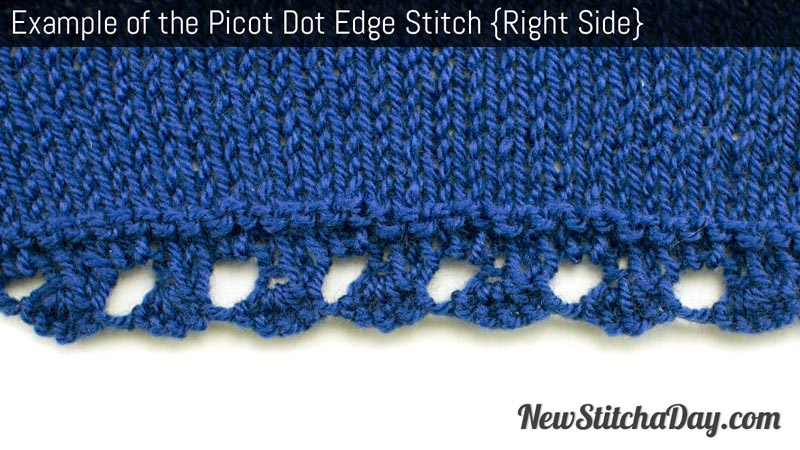
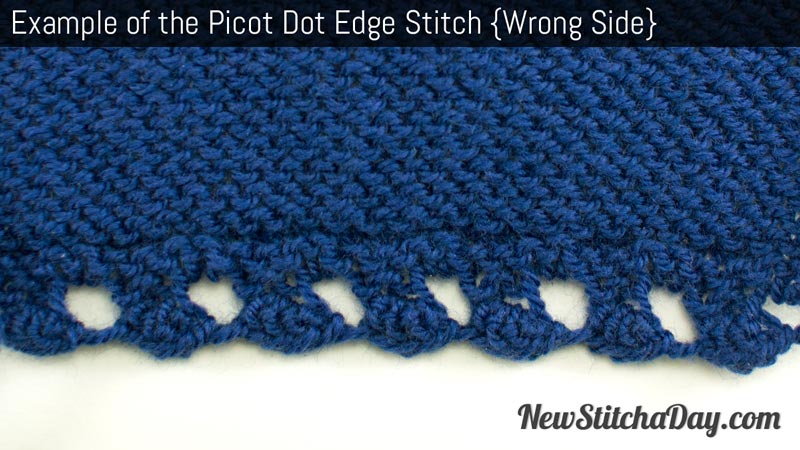
The Picot Dot Edge stitch is a beautiful lace border that can easily be added to the beginning of a project. It’s consists of small shell like clusters of stitches with tiny eyelet holes between them. This simple yet delicate border is used from the bottom up, that is starting from your cast on edge.
If you use this picot edge stitch for a baby blanket, how would you adapt it for the sides of your work?
I love your instructional videos……Thank You!
Stephanie Fite
Johnny Vasquez says:
I would probably make the edging separately and then sew it on later.
Rick Martin says:
Would it not also be possible to pick up stitches along the side and then work the picot edging? I think I’ve done something at least similar to that before.
Johnny Vasquez says:
No because the picot edging is worked from the bottom up. If it were top down, then yes.
Sharon Levering says:
I learned to work yarn overs by bringing the yarn forward first and then over the needle when working a yo after a knit and before another knit stitch, but I see you work yarn overs in reverse (back first and over the needle to the front. Is that what requires a ktbl on the next row?
Johnny Vasquez says:
Yes. Both work just fine though. You probably wouldn’t need to ktbl on the next row with your method. Your method will produce a slightly smaller hole.
knittingdancer says:
I have a question about row 3. On the video you repeated the pattern to the last 3 stitches, then you knit 2 stitches and knit the last stitch through the back loop. On the written instructions in the video and on the blog said repeat to last 2 stitches, then knit 2. Which one is correct? I enjoy watching your videos each day and am very happy they are done in the English style, so many videos on you tube are only in the continental method of knitting. Thanks for all the work you and your family puts in these videos and newsletters.
Johnny Vasquez says:
The written directions are correct. I must have had an extra stitch for some reason and that’s why I said 3 instead of 2.
Tess says:
Thanks Johnny, for ALL your videos.You can’t imagen how much help you are, I am looking forward to your’e e-mails every day
Tess
If you use this picot edge stitch for a baby blanket, how would you adapt it for the sides of your work?
I love your instructional videos……Thank You!
Stephanie Fite
I would probably make the edging separately and then sew it on later.
Would it not also be possible to pick up stitches along the side and then work the picot edging? I think I’ve done something at least similar to that before.
No because the picot edging is worked from the bottom up. If it were top down, then yes.
I learned to work yarn overs by bringing the yarn forward first and then over the needle when working a yo after a knit and before another knit stitch, but I see you work yarn overs in reverse (back first and over the needle to the front. Is that what requires a ktbl on the next row?
Yes. Both work just fine though. You probably wouldn’t need to ktbl on the next row with your method. Your method will produce a slightly smaller hole.
I have a question about row 3. On the video you repeated the pattern to the last 3 stitches, then you knit 2 stitches and knit the last stitch through the back loop. On the written instructions in the video and on the blog said repeat to last 2 stitches, then knit 2. Which one is correct? I enjoy watching your videos each day and am very happy they are done in the English style, so many videos on you tube are only in the continental method of knitting. Thanks for all the work you and your family puts in these videos and newsletters.
The written directions are correct. I must have had an extra stitch for some reason and that’s why I said 3 instead of 2.
Thanks Johnny, for ALL your videos.You can’t imagen how much help you are, I am looking forward to your’e e-mails every day
Tess