LnRiLWZpZWxke21hcmdpbi1ib3R0b206MC43NmVtfS50Yi1maWVsZC0tbGVmdHt0ZXh0LWFsaWduOmxlZnR9LnRiLWZpZWxkLS1jZW50ZXJ7dGV4dC1hbGlnbjpjZW50ZXJ9LnRiLWZpZWxkLS1yaWdodHt0ZXh0LWFsaWduOnJpZ2h0fS50Yi1maWVsZF9fc2t5cGVfcHJldmlld3twYWRkaW5nOjEwcHggMjBweDtib3JkZXItcmFkaXVzOjNweDtjb2xvcjojZmZmO2JhY2tncm91bmQ6IzAwYWZlZTtkaXNwbGF5OmlubGluZS1ibG9ja311bC5nbGlkZV9fc2xpZGVze21hcmdpbjowfQ==
LnRiLWhlYWRpbmcuaGFzLWJhY2tncm91bmR7cGFkZGluZzowfQ==
About this Stitch Pattern
LnRiLWZpZWxkW2RhdGEtdG9vbHNldC1ibG9ja3MtZmllbGQ9IjdhYzdlZDA3ODAzYTBjZjkwMTQyNDNiZWQxY2MyZTU1Il0geyB0ZXh0LXRyYW5zZm9ybTogY2FwaXRhbGl6ZTsgfSAgaDMudGItaGVhZGluZ1tkYXRhLXRvb2xzZXQtYmxvY2tzLWhlYWRpbmc9ImVjNTcwMDY3ZGU2ZGNmMjgxMGY4YTk5Y2FjNDRlZmYwIl0gIHsgbGluZS1oZWlnaHQ6IDBweDsgfSAgICAudGItZmllbGRbZGF0YS10b29sc2V0LWJsb2Nrcy1maWVsZD0iYWE2MjUwZjFmYWNkYjRjN2U0ZDQ5OWY5M2M0MDQyZDIiXSB7IHRleHQtYWxpZ246IGNlbnRlcjsgfSAgLnRiLWZpZWxkW2RhdGEtdG9vbHNldC1ibG9ja3MtZmllbGQ9IjAyY2VmZGYzNGZmOTIwZDY3NTI5YjlhYjkzMTA5NWM5Il0geyB0ZXh0LWFsaWduOiBjZW50ZXI7IH0gIC50Yi1maWVsZFtkYXRhLXRvb2xzZXQtYmxvY2tzLWZpZWxkPSIxMjMwYzgzYzY3NWRjM2ZmNGY4MTM2YTM5MTVjY2Y4NCJdIHsgdGV4dC1hbGlnbjogY2VudGVyOyB9ICAgLnRiLWZpZWxkW2RhdGEtdG9vbHNldC1ibG9ja3MtZmllbGQ9Ijg5Y2IzMDI1NjhhZTI5ODMwZWVjMTM4Y2QzYTFlZWY2Il0geyB0ZXh0LWFsaWduOiBjZW50ZXI7IH0gICBoMi50Yi1oZWFkaW5nW2RhdGEtdG9vbHNldC1ibG9ja3MtaGVhZGluZz0iMGI5YWI0MTk4MWU2MTk2NGM5ZjgxNjZjYjZkZWVjYmIiXSAgeyBsaW5lLWhlaWdodDogMHB4OyB9ICBAbWVkaWEgb25seSBzY3JlZW4gYW5kIChtYXgtd2lkdGg6IDc4MXB4KSB7ICAgICAgICAgICAgIH0gQG1lZGlhIG9ubHkgc2NyZWVuIGFuZCAobWF4LXdpZHRoOiA1OTlweCkgeyAgICAgICAgICAgICB9IA==
horizontal herringbone stitch.
[VIDEO] Stitch Pattern Tutorial
LnRiLWZpZWxkW2RhdGEtdG9vbHNldC1ibG9ja3MtZmllbGQ9IjdhYzdlZDA3ODAzYTBjZjkwMTQyNDNiZWQxY2MyZTU1Il0geyB0ZXh0LXRyYW5zZm9ybTogY2FwaXRhbGl6ZTsgfSAgaDMudGItaGVhZGluZ1tkYXRhLXRvb2xzZXQtYmxvY2tzLWhlYWRpbmc9ImVjNTcwMDY3ZGU2ZGNmMjgxMGY4YTk5Y2FjNDRlZmYwIl0gIHsgbGluZS1oZWlnaHQ6IDBweDsgfSAgICAudGItZmllbGRbZGF0YS10b29sc2V0LWJsb2Nrcy1maWVsZD0iYWE2MjUwZjFmYWNkYjRjN2U0ZDQ5OWY5M2M0MDQyZDIiXSB7IHRleHQtYWxpZ246IGNlbnRlcjsgfSAgLnRiLWZpZWxkW2RhdGEtdG9vbHNldC1ibG9ja3MtZmllbGQ9IjAyY2VmZGYzNGZmOTIwZDY3NTI5YjlhYjkzMTA5NWM5Il0geyB0ZXh0LWFsaWduOiBjZW50ZXI7IH0gIC50Yi1maWVsZFtkYXRhLXRvb2xzZXQtYmxvY2tzLWZpZWxkPSIxMjMwYzgzYzY3NWRjM2ZmNGY4MTM2YTM5MTVjY2Y4NCJdIHsgdGV4dC1hbGlnbjogY2VudGVyOyB9ICAgLnRiLWZpZWxkW2RhdGEtdG9vbHNldC1ibG9ja3MtZmllbGQ9Ijg5Y2IzMDI1NjhhZTI5ODMwZWVjMTM4Y2QzYTFlZWY2Il0geyB0ZXh0LWFsaWduOiBjZW50ZXI7IH0gICBoMi50Yi1oZWFkaW5nW2RhdGEtdG9vbHNldC1ibG9ja3MtaGVhZGluZz0iMGI5YWI0MTk4MWU2MTk2NGM5ZjgxNjZjYjZkZWVjYmIiXSAgeyBsaW5lLWhlaWdodDogMHB4OyB9ICBAbWVkaWEgb25seSBzY3JlZW4gYW5kIChtYXgtd2lkdGg6IDc4MXB4KSB7ICAgICAgICAgICAgIH0gQG1lZGlhIG9ubHkgc2NyZWVuIGFuZCAobWF4LXdpZHRoOiA1OTlweCkgeyAgICAgICAgICAgICB9IA==
VIDEO
Subscribe to our YouTube channel
Techniques Used In This Stitch Pattern
Stitch Pattern Details
Stitch Repeat
Multiples of 7 + 1
Stitch Pattern Instructions
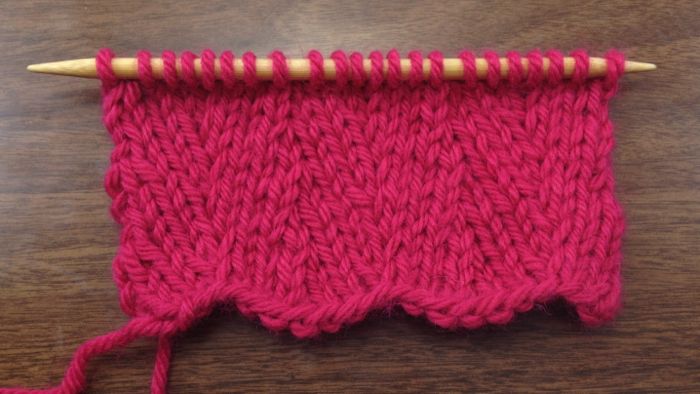
Stitch Pattern Swatch Photos
Stitch Pattern Characteristics
Quick question … confused a little.
Your pattern is written in your post and above the video as: *K2tog, k2, krl, k2; rep from * to last st, k1
However when demonstrating it is being done: *K2tog, k2, krl, K1, k2; rep from * to last st, k1
Do as written? Or as shown?
BTW: LOVE the videos!
The KRL increase is comprised of two steps:
1. Knit the stitch below
2. Then knit the stitch above
So it seems like there should be an additional K1 included, but it’s actually just part of the KRL.
wonderful site, instructions
Thanks!