Hi! Many thanks for this very interesting pattern. Is there a corresponding “right slanting” turkish rib stitch to complement this? I’m thinking I might use this on a shawl, and would need this nice stitch’s counterpart 😉
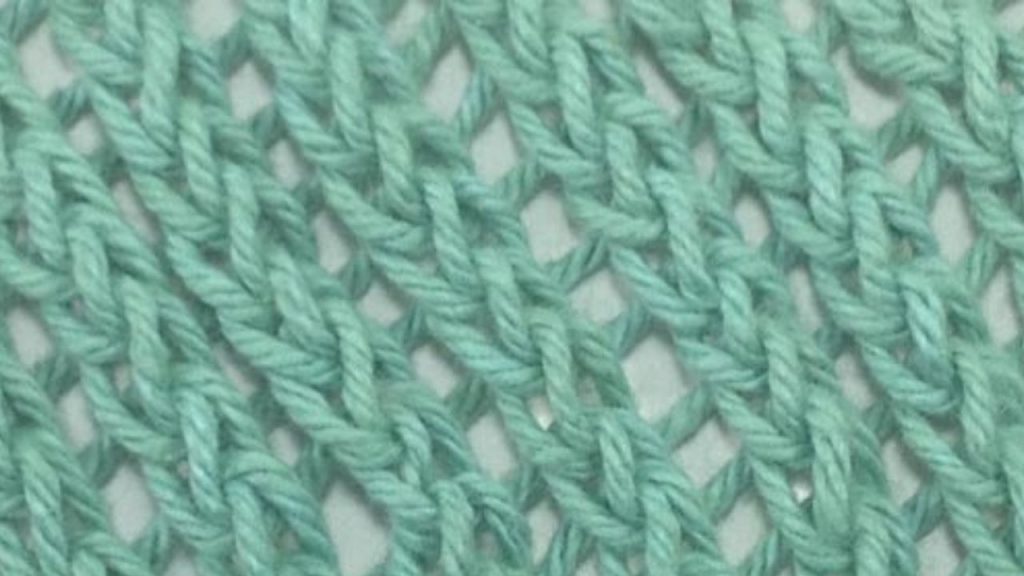
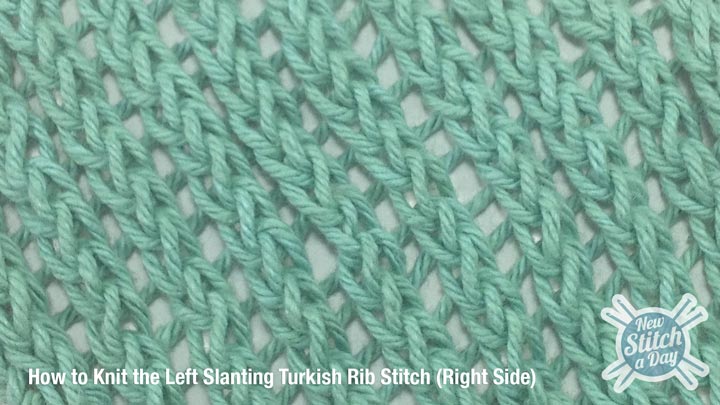
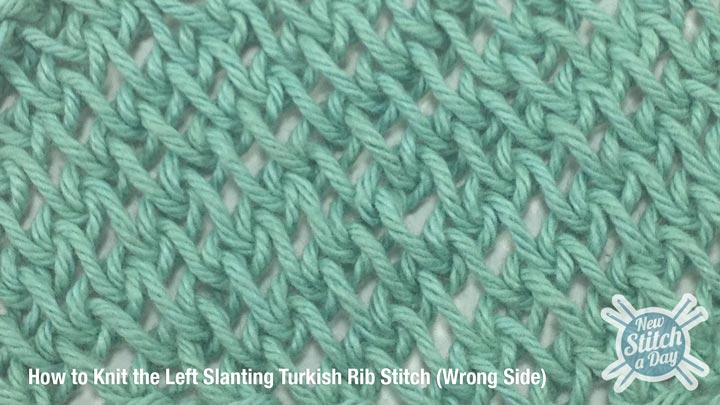
@Alabama_Lizzie It could work for a washcloth. But the whole thing will be slanted. It makes a rhombus shape.
BobBeer says:
I live in Turkey and have seen this used mostly for little knit bags, sachets etc. How would it work if there were no wrong side (I.e. when knitting in the round)?
@BobBeer I’ll have to think about that. I think I would get rid of the k1 and p1 at the beginning and end of each row. In row two I think you need to change the k1 to a p1 and move the yo to the beginning of the repeat.
I haven’t tested this but it should be read:
Prep Row: purl all
Row 1: *yo, PR; rep from * to end.
Row 2: *yo, sl 1, p1, psso; rep from * to end.
That may leave it with the wrong side facing out, but you could just turn it inside out.
BobBeer says:
@newstitchaday Hi – checked this but it didn’t seem right, because the original pattern has purls only on Row 1, which is the WS row. Looked at it a little more and realized that the Row 1 is nothing but a purlside imitation of the RS row. So it’s actually *really* easy: sl 1, k1, psso, yo ad infinitum.
We leave off the initial and last knit stitches.
Also a note – if you do it flat (in a rhombus as Alabama Lizzie noted), it looks a lot better if you slip the first stitch in every row instead of knitting it. The slipped stitch gets worked on the end of the next row as usual.
OliviaMenesesMoguel says:
Great for a top to use on top of a bathing suit. Ty so mucho.
Hi! Many thanks for this very interesting pattern. Is there a corresponding “right slanting” turkish rib stitch to complement this? I’m thinking I might use this on a shawl, and would need this nice stitch’s counterpart 😉
@ashveenp there is. It’ll be out sometime this week.
I love it! Would it work well for a washcloth?
@Alabama_Lizzie It could work for a washcloth. But the whole thing will be slanted. It makes a rhombus shape.
I live in Turkey and have seen this used mostly for little knit bags, sachets etc. How would it work if there were no wrong side (I.e. when knitting in the round)?
@BobBeer I’ll have to think about that. I think I would get rid of the k1 and p1 at the beginning and end of each row. In row two I think you need to change the k1 to a p1 and move the yo to the beginning of the repeat.
I haven’t tested this but it should be read:
Prep Row: purl all
Row 1: *yo, PR; rep from * to end.
Row 2: *yo, sl 1, p1, psso; rep from * to end.
That may leave it with the wrong side facing out, but you could just turn it inside out.
@newstitchaday Hi – checked this but it didn’t seem right, because the original pattern has purls only on Row 1, which is the WS row. Looked at it a little more and realized that the Row 1 is nothing but a purlside imitation of the RS row. So it’s actually *really* easy: sl 1, k1, psso, yo ad infinitum.
We leave off the initial and last knit stitches.
Also a note – if you do it flat (in a rhombus as Alabama Lizzie noted), it looks a lot better if you slip the first stitch in every row instead of knitting it. The slipped stitch gets worked on the end of the next row as usual.
Great for a top to use on top of a bathing suit. Ty so mucho.